Github Pages
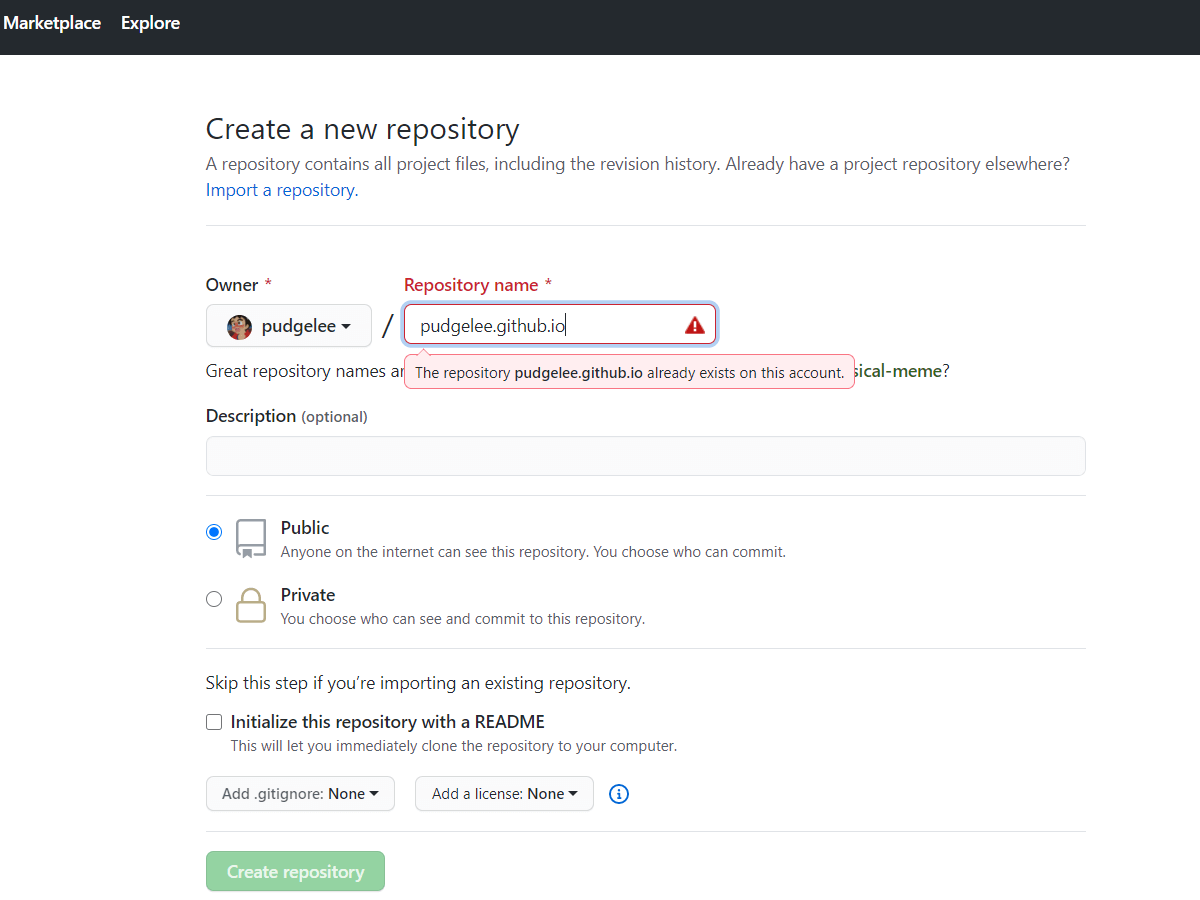
创建repository
仓库名
GitHub账号名称.github.io仓库可见性
public
仓库Setting
- 在仓库Setting中找到GitHub Pages选项,点击Change theme
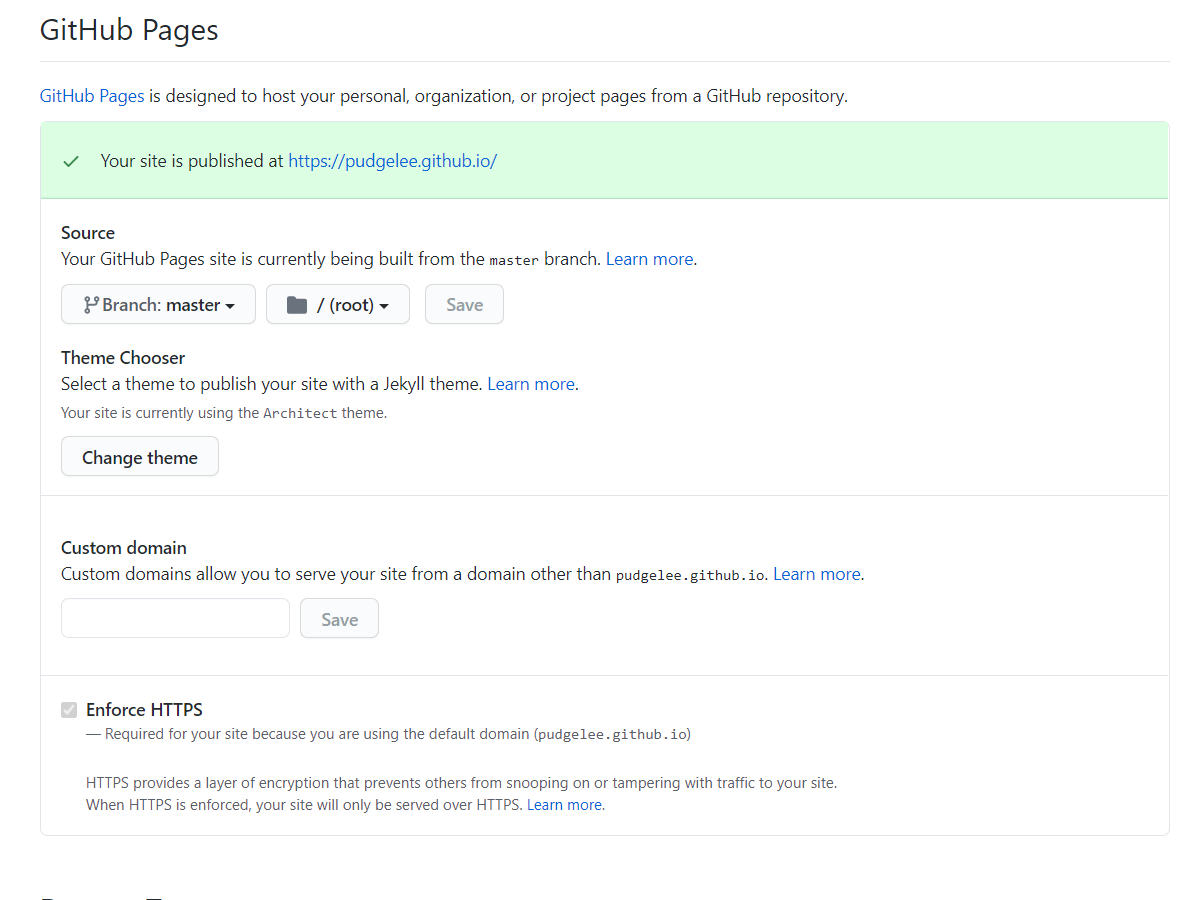
- 访问
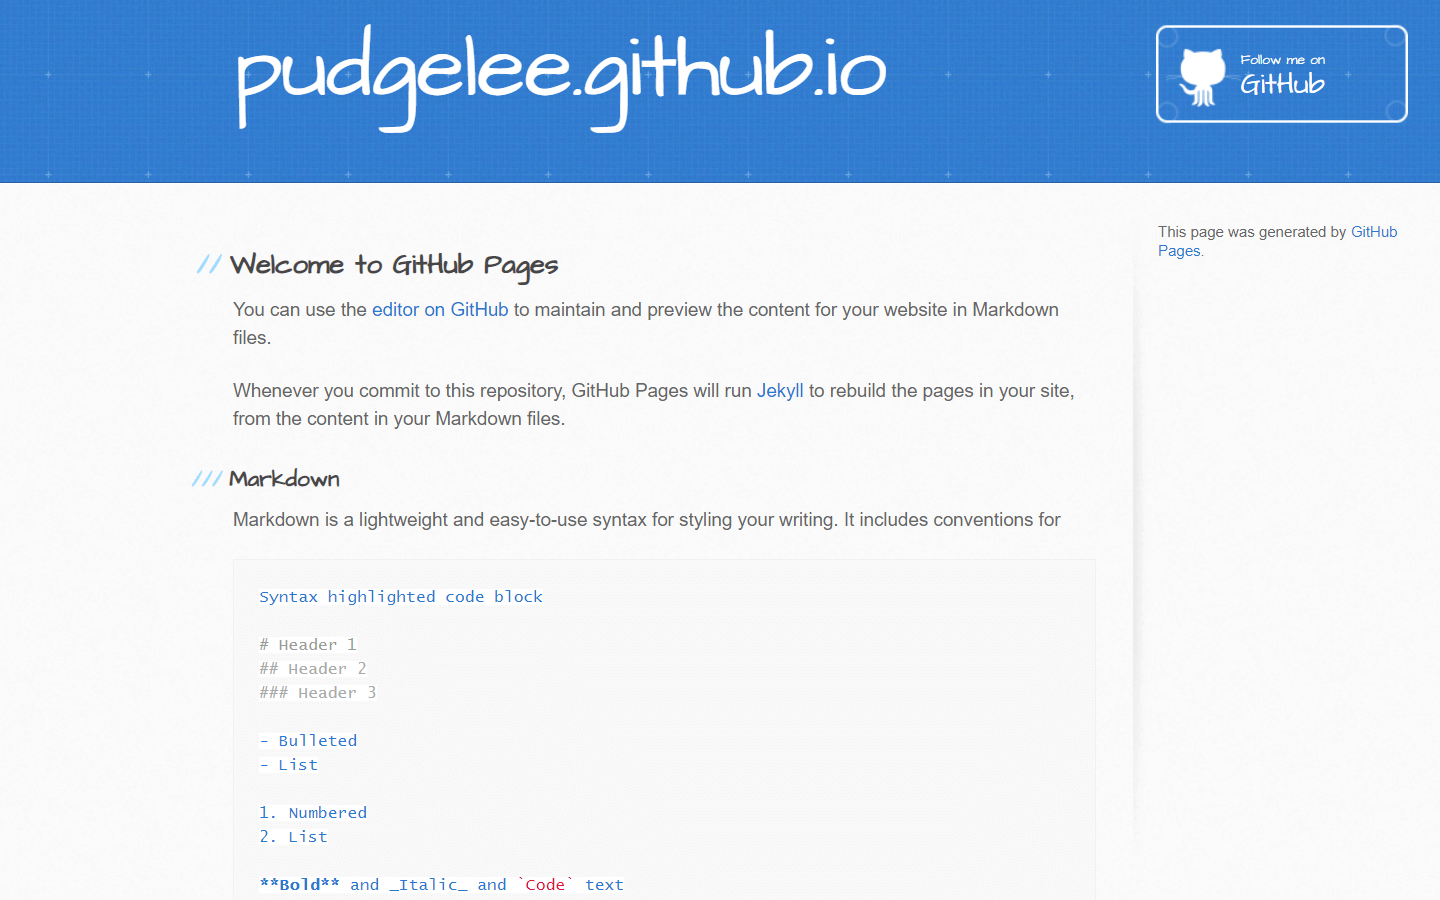
GitHub账号名称.github.io出现以下页面说明成功啦
Hexo
Hexo安装
npm install hexo如果出现 Unable to locate package hexo 时,请尝试
npm install -g hexo-cli- 查看版本信息
hexo -v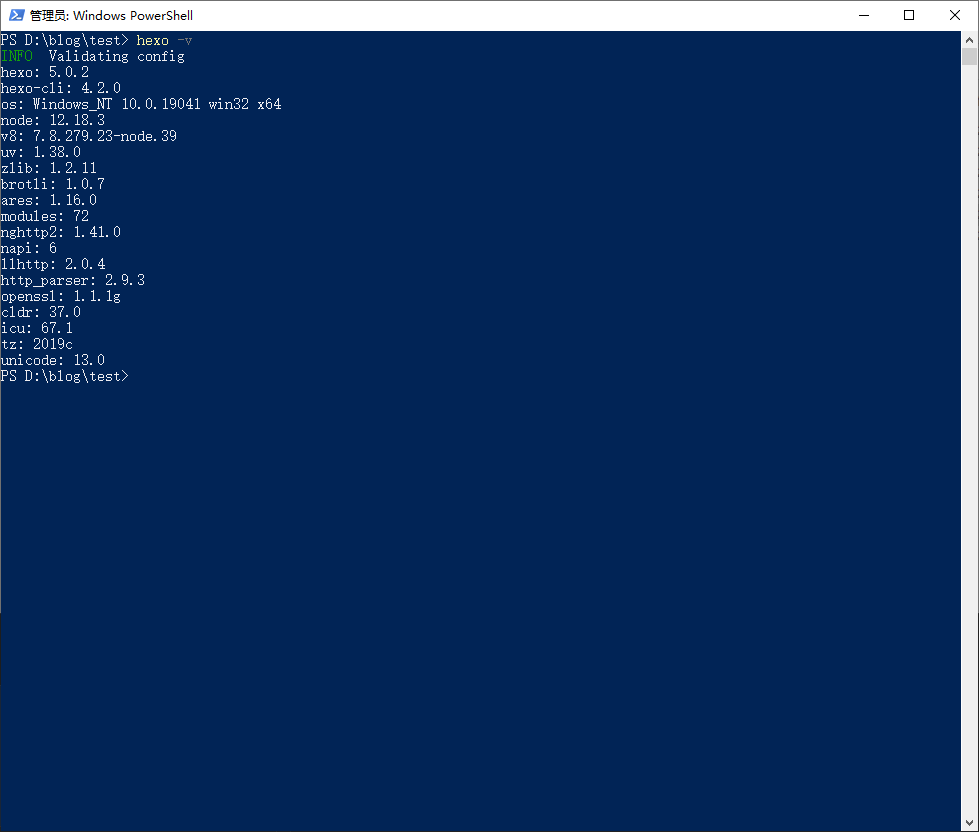
初始化Hexo程序
hexo init
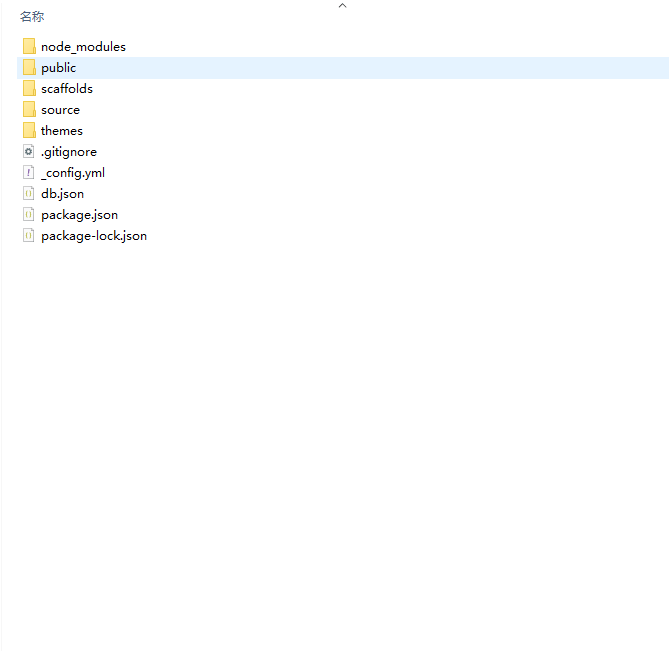
文件结构
node_modules: 依赖包
scaffolds:生成文章的一些模板
source:用来存放你的文章
themes:主题
_config.yml: 博客的配置文件
Hexo 常用指令
- 清除缓存
hexo clean- 编译生成
hexo g
- 本地测试
hexo s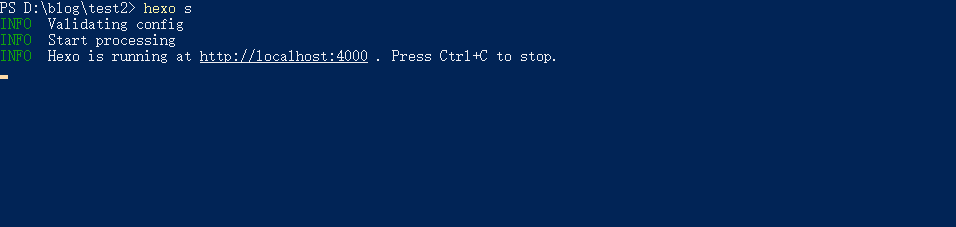
部署到github
- 在项目根目录下,安装Git部署插件:
npm install hexo-deployer-git --save- 编辑修改站点配置文件
_config.yml
# Deployment
## Docs: https://hexo.io/docs/deployment.html
deploy:
  type: 'git'
  repo:
    github: https://github.com/pudgelee/pudgelee.github.io.git
branch: master- 生成并部署到github
hexo g
hexo d
主题
Hexo主题
Next
github地址
git clone https://github.com/theme-next/hexo-theme-next themes/next7站点配置和Next主题优化
- 以下内容均为Copy,想不到还是走了老路,原文章地址点这里,如有侵权,好汉饶命:(
站点 _config.yml 基本配置
修改hexo目录下的站点配置文件:
更改标题副标题语言等等
更改主题配置文件不太好,我们可以把它复制到~/hexo/source/_data文件夹内,如果没有_data就创建一个。然后把 _config.yml重命名为next.yml
然后编辑next.yml文件,找到开头的
# override: false
# 改为:
override: true
这样就无需配置主题文件啦
这样做有很多好处,比如更新的话会方便很多。尽量让小白少绕弯路!
(不过绕弯路也是好的,可以学到很多。)
主题 next.yml基本配置
修改你刚刚在 _data 文件夹里创建的「主题配置文件」:
设置语言
你应该已经在站点配置文件中改好language了。
现在,再在 ~/hexo/source/_data 目录下创建languages.yml文件
写入:
zh-CN:
  menu:
    home: 首页
    top: 热榜
    archives: 归档
    categories: 分类
    tags: 标签
    about: 关于
    links: 友情链接
    search: 搜索
    schedule: 日程表
    sitemap: 站点地图
修改menu
找到这里:(118行左右)
menu:
  home: / || fa fa-home
  #about: /about/ || fa fa-user
  #tags: /tags/ || fa fa-tags
  #categories: /categories/ || fa fa-th
  archives: /archives/ || fa fa-archive
  #schedule: /schedule/ || fa fa-calendar
  #sitemap: /sitemap.xml || fa fa-sitemap
  #commonweal: /404/ || fa fa-heartbeat
可以根据你的喜好来配置,我是改成这样:
menu:
  home: / || fa fa-home
  about: /about/ || fa fa-user
  tags: /tags/ || fa fa-tags
  categories: /categories/ || fa fa-th
  archives: /archives/ || fa fa-archive
  #schedule: /schedule/ || fa fa-calendar
  #sitemap: /sitemap.xml || fa fa-sitemap
#commonweal: /404/ || fa fa-heartbeat把注释#号去掉就行了。
然后在hexo目录下执行:
hexo new page "about"
hexo new page "tags"
hexo new page "categories"
生成完毕以后再分别修改
~/hexo/source/about/index.md
改为:
---
title: 关于
date: 2020-05-15 18:54:34
type: "about"
---
~/hexo/source/tags/index.md
改为:
---
title: 标签
date: 2020-05-15 18:54:35
type: "tags"
---
~/hexo/source/categories/index.md
改为:
---
title: 分类
date: 2020-05-15 18:54:36
type: "categories"
---
选择 Scheme
Scheme 是 NexT 提供的一种特性,借助于 Scheme,NexT 为你提供多种不同的外观。同时,几乎所有的配置都可以 在 Scheme 之间共用。目前 NexT 支持三种 Scheme,他们是:
- Muse - 默认 Scheme,这是 NexT 最初的版本,黑白主调,大量留白
- Mist - Muse 的紧凑版本,整洁有序的单栏外观
- Pisces - 双栏 Scheme,小家碧玉似的清新
Scheme 的切换通过更改
主题配置文件,搜索scheme关键字。 你会看到有三行 scheme 的配置,将你需用启用的 scheme 前面注释#去除即可。
官网上是这么说的,我用的是 Gemini的Scheme。
美化
解决了基本的博客问题后,终于可以讲讲美化了。
注意,如果控件在界面的显示出现了错位现象,可以清除浏览器缓存,再看看,可能就好了。
文章在首页收起显示和隐藏正文内容
在首页把所有文章全显示出来多难看。
- 其实只要在你想要收起的地方添上
<!--more-->就行了。
- 用
<!--more-->不展示正文内容 :在描述文档后添加 <!--more-->
---
title: 通过GithubPages建blog
date: 2020-08-14 12:14:39
tags:
- Hexo
- Github Pages
categories: Blog
---

<!--more-->- 也可以描述文档中添加
description:不展示正文内容--- title: 通过GithubPages建blog date: 2020-08-14 12:14:39 tags: - Hexo - Github Pages categories: Blog description: Github Pages + Hexo + Next主题 ---
设置字体
修改next.yml:
找到:
font:
  enable: false

  # Uri of fonts host, e.g. https://fonts.googleapis.com (Default).
  host:

  # Font options:
  # `external: true` will load this font family from `host` above.
  # `family: Times New Roman`. Without any quotes.
  # `size: x.x`. Use `em` as unit. Default: 1 (16px)

  # Global font settings used for all elements inside <body>.
  global:
    external: true
    family: Lato
    size:

  # Font settings for site title (.site-title).
  title:
    external: true
    family:
    size:

  # Font settings for headlines (<h1> to <h6>).
  headings:
    external: true
    family:
    size:

  # Font settings for posts (.post-body).
  posts:
    external: true
    family:

  # Font settings for <code> and code blocks.
  codes:
    external: true
family:enable改为true,其他自己设置
设置建站时间
还是next.yml
找到这里:
footer:
  # Specify the date when the site was setup. If not defined, current year will be used.
  # since: 2015
  # 改为:
  since: 2020
隐藏底部「由hexo强力驱动」
还是next.yml
找到:
footer:
  # Specify the date when the site was setup. If not defined, current year will be used.
  since: 2020

  # Icon between year and copyright info.
  icon:
    # Icon name in Font Awesome. See: https://fontawesome.com/icons
    name: fa fa-heart
    # If you want to animate the icon, set it to true.
    animated: false
    # Change the color of icon, using Hex Code.
    color: "#ff0000"

  # If not defined, `author` from Hexo `_config.yml` will be used.
  copyright:

  # Powered by Hexo & NexT
  powered: true
把 animated 改为 true( 的动画效果)
把 powered 改为 false
设置头像
在~/hexo/source文件夹下创建文件夹images
里面随便放一张图片,比如说 avatar.png
然后编辑next.yml,找到这里:
# Sidebar Avatar
avatar:
  # Replace the default image and set the url here.
改为:
# Sidebar Avatar
avatar:
  # Replace the default image and set the url here.
  url: /images/avatar.png
  # If true, the avatar will be dispalyed in circle.
  rounded: false
  # If true, the avatar will be rotated with the cursor.
  rotated: true
rotated是设置头像随着鼠标转的,我觉得这样很酷。
当然如果你想要你的头像是圆的话,只要把rounded改为true就行了
localsearch
在hexo目录下与运行:npm install hexo-generator-searchdb \--save
修改你的next.yml:
local_search:
  enable: false
  # If auto, trigger search by changing input.
  # If manual, trigger search by pressing enter key or search button.
  trigger: auto
  # Show top n results per article, show all results by setting to -1
  top_n_per_article: 1
  # Unescape html strings to the readable one.
  unescape: false
  # Preload the search data when the page loads.
preload: false把那个enable改为true就行了
等等,还没完!!
在hexo目录下的站点配置文件 \_config.yml 中添加:
search:
  path: search.xml
  field: post
  format: html
  limit: 10000
local_search:
  enable: true
炫酷的背景
进入~/hexo/themes/next7目录下
运行:
git clone https://github.com/theme-next/theme-next-three source/lib/three然后再进入next.yml中,
找到这里:
three:
  enable: false
  three_waves: false
  canvas_lines: false
  canvas_sphere: false
设置成自己喜欢的:
three:
  enable: true
  three_waves: true
  canvas_lines: false
  canvas_sphere: false
设置GayHub猫
任然是修改next.yml:
找到
github_banner:
  enable: false
  permalink: https://github.com/yourname
  title: Follow me on GitHub
当然还是改成true啦
github_banner:
  enable: true
  permalink: https://gitee.com/dongguagua
  title: Fork me on GitHub
设置侧栏阅读进度百分比
任然是修改next.yml:
找到back2top
修改成:
back2top:
  enable: true
  # Back to top in sidebar.
  sidebar: true
  # Scroll percent label in b2t button.
  scrollpercent: true
阅读位置标记
到~/hexo/themes/next7目录下,运行
git clone theme-next/theme-next-bookmark source/lib/bookmark然后你肯定已经猜到了,没错,还是到next.yml里面
找到bookmark
改为:
# Bookmark Support
bookmark:
  enable: true
  # Customize the color of the bookmark.
  color: "#222"
  # If auto, save the reading progress when closing the page or clicking the bookmark-icon.
  # If manual, only save it by clicking the bookmark-icon.
  save: auto
设置字数统计
在hexo目录下运行
npm install hexo-symbols-count-time --save然后进入next.yml,找到这里
# Post wordcount display settings
# Dependencies: theme-next/hexo-symbols-count-time
symbols_count_time:
  separated_meta: true
  item_text_post: true
  item_text_total: false
改为:
symbols_count_time:
  separated_meta: true
  item_text_post: true
  item_text_total: true
  awl: 2
  wpm: 275
进入站点配置文件
添加:
symbols_count_time:
  symbols: true
  time: true
  total_symbols: true
  total_time: true
图片可放大查看
这个只要开启就可以了
仍然是next.yml:
找到fancybox
就是这儿:
# FancyBox is a tool that offers a nice and elegant way to add zooming functionality for images.
# For more information: Fancy jQuery Lightbox Alternative
fancybox: false改为true就可以了
sidebar在手机上可查看
本来在手机上不能查看侧边栏的,但是大家都用的是手机,肯定得开启呀。
很简单
打开next.yml:
查找onmobile,改为true
sidebar:
  # Sidebar Position.
  position: left
  #position: right

  # Manual define the sidebar width. If commented, will be default for:
  # Muse | Mist: 320
  # Pisces | Gemini: 240
  #width: 300

  # Sidebar Display (only for Muse | Mist), available values:
  #  - post    expand on posts automatically. Default.
  #  - always  expand for all pages automatically.
  #  - hide    expand only when click on the sidebar toggle icon.
  #  - remove  totally remove sidebar including sidebar toggle.
  display: post

  # Sidebar padding in pixels.
  padding: 18
  # Sidebar offset from top menubar in pixels (only for Pisces | Gemini).
  offset: 12
  # Enable sidebar on narrow view (only for Muse | Mist).
  onmobile: true
(最后一行)
设定侧边栏的宽度
打开next.yml:
查找#width:,去掉# width可设定数值
sidebar:
  # Sidebar Position.
  position: left
  #position: right

  # Manual define the sidebar width. If commented, will be default for:
  # Muse | Mist: 320
  # Pisces | Gemini: 240
  width: 350

  # Sidebar Display (only for Muse | Mist), available values:
  #  - post    expand on posts automatically. Default.
  #  - always  expand for all pages automatically.
  #  - hide    expand only when click on the sidebar toggle icon.
  #  - remove  totally remove sidebar including sidebar toggle.
  display: post

  # Sidebar padding in pixels.
  padding: 18
  # Sidebar offset from top menubar in pixels (only for Pisces | Gemini).
  offset: 12
  # Enable sidebar on narrow view (only for Muse | Mist).
  onmobile: true
侧边栏社交链接
next.yml:
查找social:
可以找到这里:
social:
  #GitHub: https://github.com/yourname || fab fa-github
  #E-Mail: mailto:yourname@gmail.com || fa fa-envelope
  #Weibo: https://weibo.com/yourname || fab fa-weibo
  #Google: https://plus.google.com/yourname || fab fa-google
  #Twitter: https://twitter.com/yourname || fab fa-twitter
  #FB Page: https://www.facebook.com/yourname || fab fa-facebook
  #StackOverflow: https://stackoverflow.com/yourname || fab fa-stack-overflow
  #YouTube: https://youtube.com/yourname || fab fa-youtube
  #Instagram: https://instagram.com/yourname || fab fa-instagram
  #Skype: skype:yourname?call|chat || fab fa-skype
把需要的链接注释去掉就行了
就像这样:
social:
  GitHub: https://gitee.com/dongguagua || fab fa-github
  E-Mail: mailto:1448424184@qq.com || fa fa-envelope
  #Weibo: Sina Visitor System || fab fa-weibo
  Google: https://plus.google.com/guaguaguaguadong || fab fa-google
  Twitter: https://twitter.com/melon || fab fa-twitter
  #FB Page: https://www.facebook.com/yourname || fab fa-facebook
  #StackOverflow: https://stackoverflow.com/yourname || fab fa-stack-overflow
  #YouTube: https://youtube.com/yourname || fab fa-youtube
  #Instagram: https://instagram.com/yourname || fab fa-instagram
  #Skype: skype:yourname?call|chat || fab fa-skype
设置RSS订阅
进入hexo目录
运行:
npm install --save hexo-generator-feed在站点配置文件中添加:
#RSS订阅
feed:
  type: atom
  path: atom.xml
  limit: 20
  hub:
  content:
  content_limit: 140
  content_limit_delim: ' '

# 配置 RSS订阅 插件
plugins: hexo-generate-feed
在next.yml中修改:
follow_me:
  #Twitter: https://twitter.com/username || fab fa-twitter
  #Telegram: https://t.me/channel_name || fab fa-telegram
  #WeChat: /images/wechat_channel.jpg || fab fa-weixin
  RSS: /atom.xml || fa fa-rss
更改底部标签样式
原来是这样子的:
# hexo
不太好看,其实不需要改什么custom.styl,只需要在next.yml中找到tag_icon,改为true即可。
如下:
# Use icon instead of the symbol # to indicate the tag at the bottom of the post
tag_icon: true
代码块Mac-OS样式
不得不说Mac的UI做的还是很好的。
网上有很多模仿Mac的代码块,效果很好,我也想弄!next7里可以直接设置了,还是打开next.yml:
找到codeblock:
改成这样子:
codeblock:
  # Code Highlight theme
  # Available values: normal | night | night eighties | night blue | night bright | solarized | solarized dark | galactic
  # See: chriskempson/tomorrow-theme
  highlight_theme: galactic
  # Add copy button on codeblock
  copy_button:
    enable: true
    # Show text copy result.
    show_result: true
    # Available values: default | flat | mac
    style: mac
顺便设置了copy按钮。。。
文章版权声明
进入next.yml
查找creative_commons
改为true
像这样子:
# Creative Commons 4.0 International License.
# See: https://creativecommons.org/share-your-work/licensing-types-examples
# Available values of license: by | by-nc | by-nc-nd | by-nc-sa | by-nd | by-sa | zero
# You can set a language value if you prefer a translated version of CC license, e.g. deed.zh
# CC licenses are available in 39 languages, you can find the specific and correct abbreviation you need on https://creativecommons.org
creative_commons:
  license: by-nc-sa
  sidebar: true
  post: true
  language:
本文链接
打开站点 \_config.yml
找到 # URL
# URL
## If your site is put in a subdirectory, set url as 'http://yoursite.com/child' and root as '/child/'
url:  http://yoursite.com
root: /
permalink: :year/:month/:day/:title/
permalink_defaults:
pretty_urls:
  trailing_index: true # Set to false to remove trailing 'index.html' from permalinks
trailing_html: true # Set to false to remove trailing '.html' from permalinks将http://yoursite.com
改成自己的网址
首页显示分类、标签个数
很简单,进入next.yml
找到menu_settings
改为:
# Enable / Disable menu icons / item badges.
menu_settings:
  icons: true
badges: true把badges改为true
设置顶部/底部阅读进度条
打开next.yml:
找到reading_progress
改为:
# Reading progress bar
reading_progress:
  enable: true
  # Available values: top | bottom
  position: bottom
  color: "#37c6c0"
  height: 3px
我设置的是底部进度条。
设置图片懒加载
打开next.yml:
找到lazyload
改为:
lazyload: true
这样做可以提高打开速度
注意!!!如果图片显示出了什么问题的话,请关闭此功能!!!!
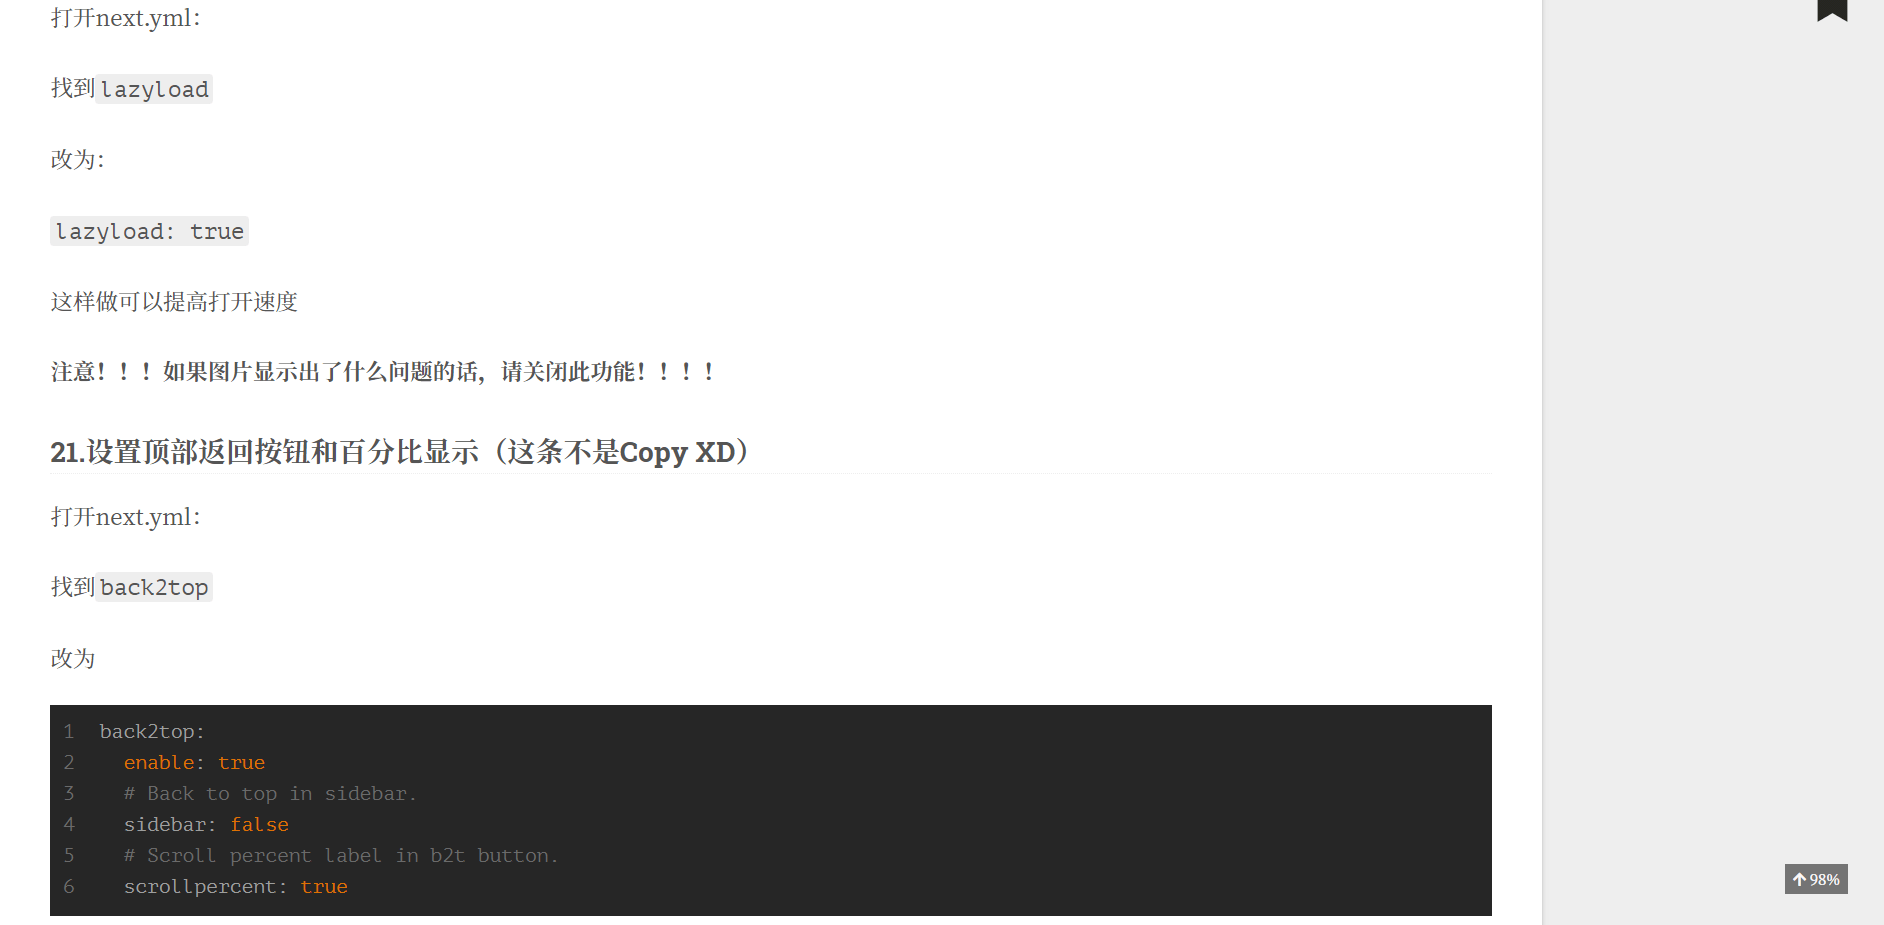
返回顶部按钮和百分比显示
打开 next.yml:
找到 back2top
改为
back2top:
  enable: true
  # Back to top in sidebar.
  sidebar: false
  # Scroll percent label in b2t button.
  scrollpercent: true
效果图
其他的设定
- 比较麻烦的或想用到时再请教G老师再扣点 :`)